
The Create Template Link wizard walks you through building one link for a template. Start it from New Link in the Published Links manager.
The steps you see depend on the link type you choose in Step 1. A URL or Automatic File Generation link has fewer steps; an Embedded Table Link has the full set. This article covers every step. Skip the ones that don't appear for your type.
The wizard step bar shows your progress. Next advances, Back returns, and Done saves and closes once required steps (marked with a red asterisk) are complete.
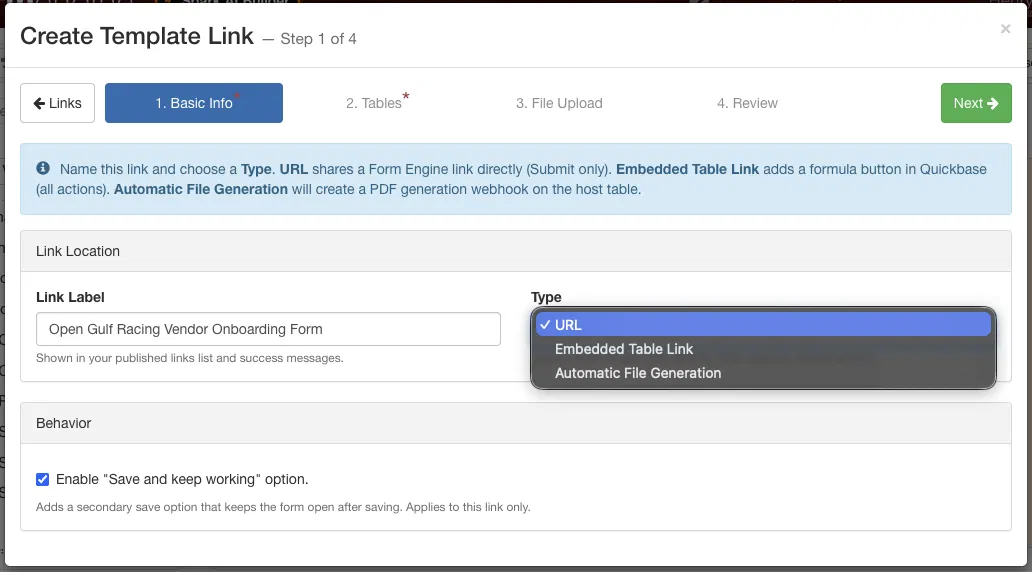
Step 1 — Basic Info
Name the link and choose its type.
- Link Label — the name shown in your Published Links list and success messages. For Embedded Table Link and Automatic File Generation types, this label also appears on the formula button in Quickbase.
- Type — URL, Embedded Table Link, or Automatic File Generation. (See Publishing Links for what each type does.)
- Host Table — appears for Embedded Table Link and Automatic File Generation. This is the Quickbase table where the link is hosted.
- Enable "Save and keep working" — adds a secondary save option that keeps the form open after saving. Applies to this link only, and is not relevant for Automatic File Generation.
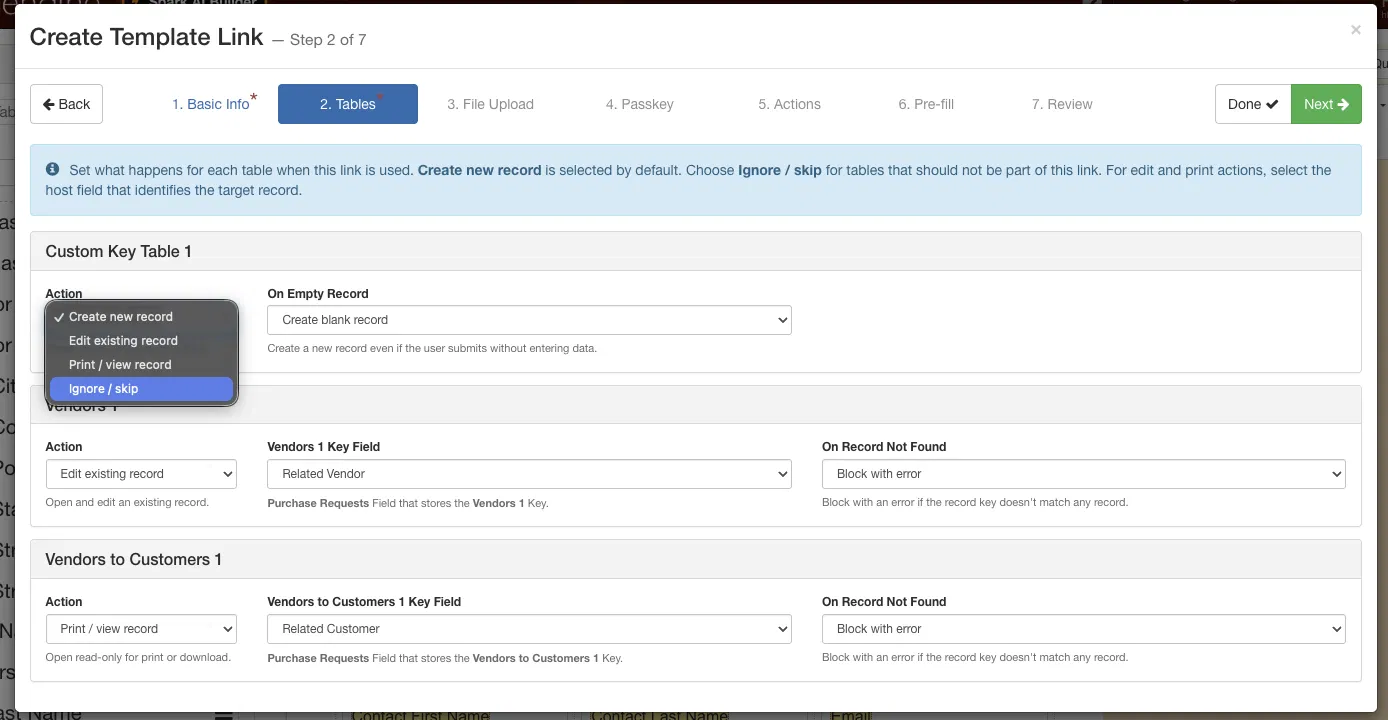
Step 2 — Tables
Set what happens to each table the template touches when the link is used. Create new record is selected by default.
For each table, choose an Action:
- Create new record — adds a new record on submit.
- Edit existing record — opens and updates an existing record. (Embedded Table Link only.)
- Print / view record — opens read-only, for printing or downloading. (Embedded Table Link only.)
- Ignore / skip — treats that table's fields as if they don't exist on the form. Use this for tables that shouldn't be part of this link.
Depending on the action, you'll set additional options:
- On Empty Record (Create new record) — Create blank record makes a record even if the user submits without entering data; Skip if no data entered skips record creation when empty.
- [Table] Key Field (Edit / Print) — the host field that stores the key identifying the target record.
- On Record Not Found (Edit / Print) — what happens when the key matches no record: Block with error, Warn, or proceed. Choose based on how strict the link should be.
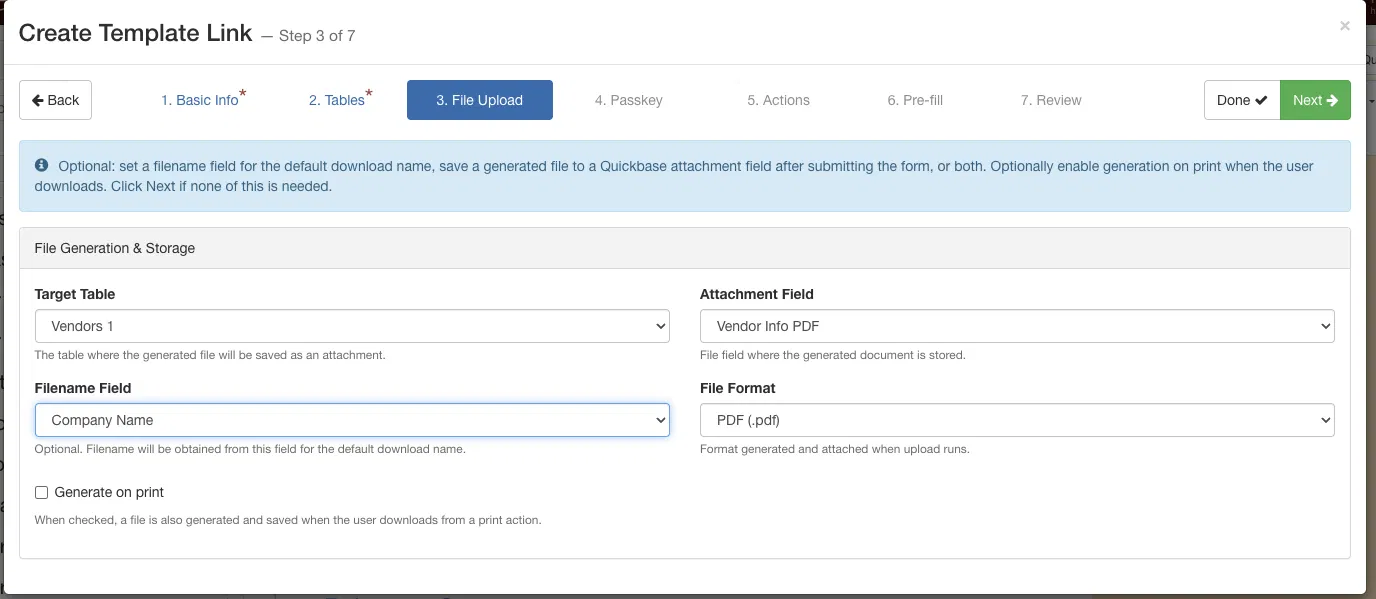
Step 3 — File Upload
Optional. Set whether a generated file is saved back to Quickbase when the form is used. Click Next if you don't need file output.
- Target Table — the table where the generated file is saved as an attachment.
- Attachment Field — the file field that stores the generated document.
- Filename Field — optional; the field whose value becomes the default download name.
- File Format — the format generated and attached when the upload runs (for example, PDF).
- Generate on print — when checked, a file is also generated and saved when the user downloads from a print action.
File generation is now configured per link. Previously this lived on the template and applied everywhere. Now each link off the same template can produce different file output. See What's Changed for details.
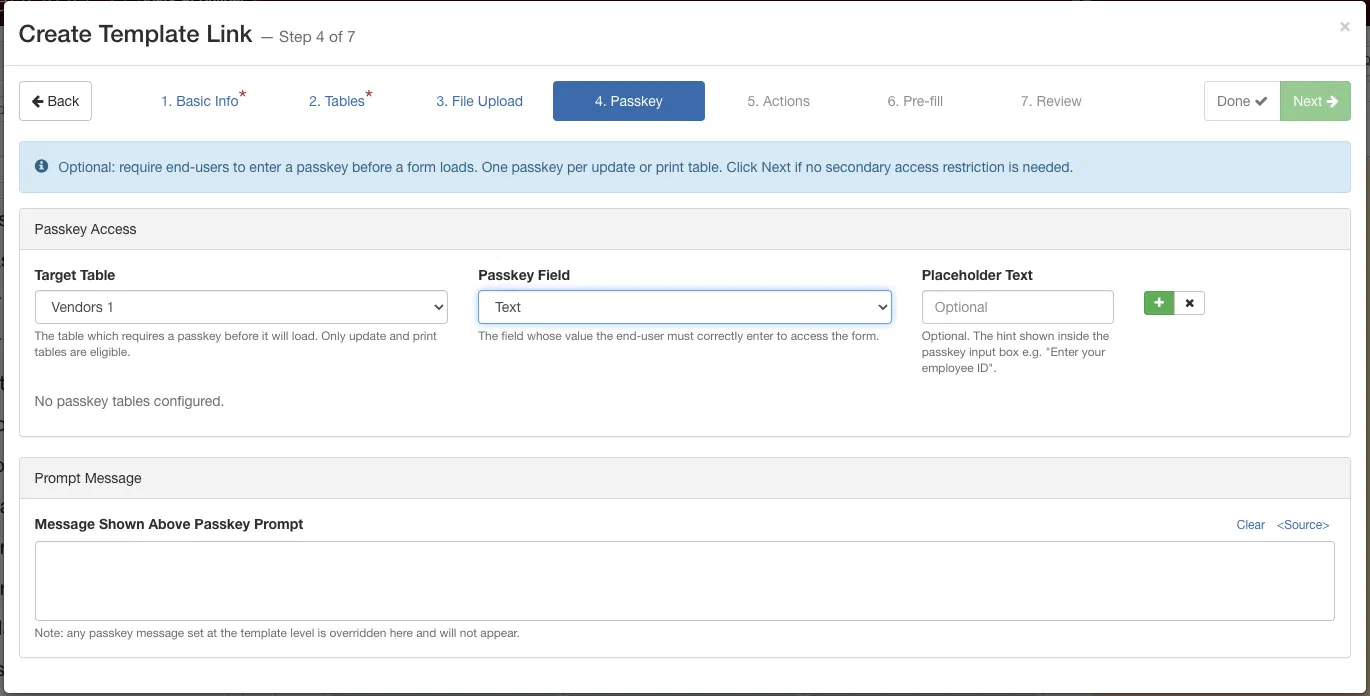
Step 4 — Passkey
Optional. Embedded Table Link only. Require end-users to enter a passkey before the form loads. Click Next if no secondary access restriction is needed.
Add one passkey per table using the + button:
- Target Table — the table that requires a passkey before it loads. Only update and print tables are eligible.
- Passkey Field — the field whose value the end-user must enter correctly to access the form.
- Placeholder Text — optional hint shown inside the passkey input box (for example, "Enter your employee ID").
You can configure one passkey per Target Table. Configured passkeys appear in a list below, each with a delete control.
Under Prompt Message, set the Message Shown Above Passkey Prompt. Any passkey message set at the template level is overridden here and will not appear.
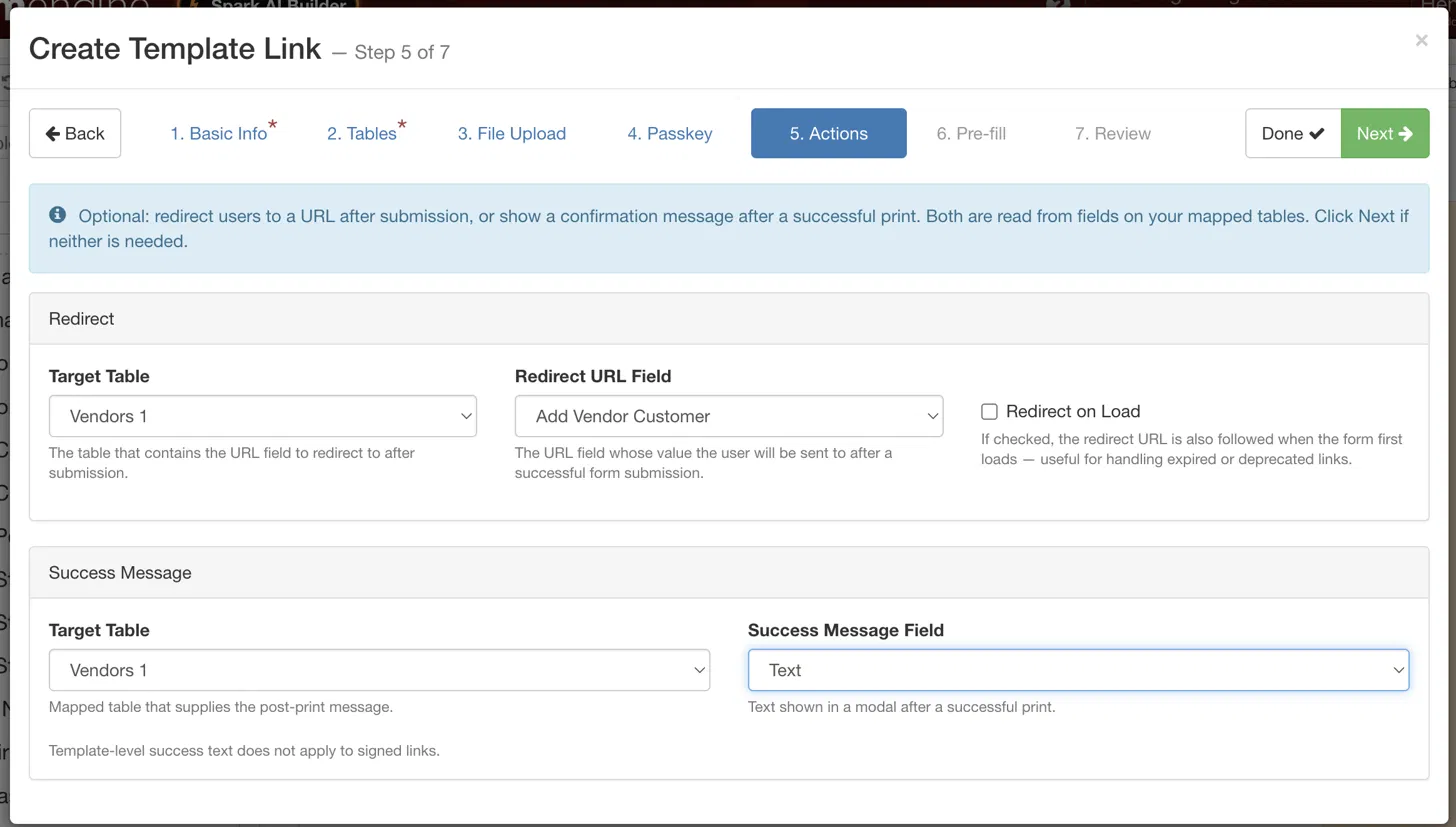
Step 5 — Actions
Optional. Redirect users after submission, or show a confirmation message after a successful print. Both values are read from fields on your mapped tables. Click Next if neither is needed.
Redirect
- Target Table — the table containing the URL field to redirect to.
- Redirect URL Field — the URL field whose value the user is sent to after a successful submission. Must be a URL field.
- Redirect on Load — when checked, the redirect URL is also followed when the form first loads. Useful for deprecating or handling expired links.
Success Message
- Target Table — the mapped table that supplies the post-print message.
- Success Message Field — the text shown in a modal after a successful print. Must be a Text or Rich Text field.
Template-level success text does not apply to Smart links.
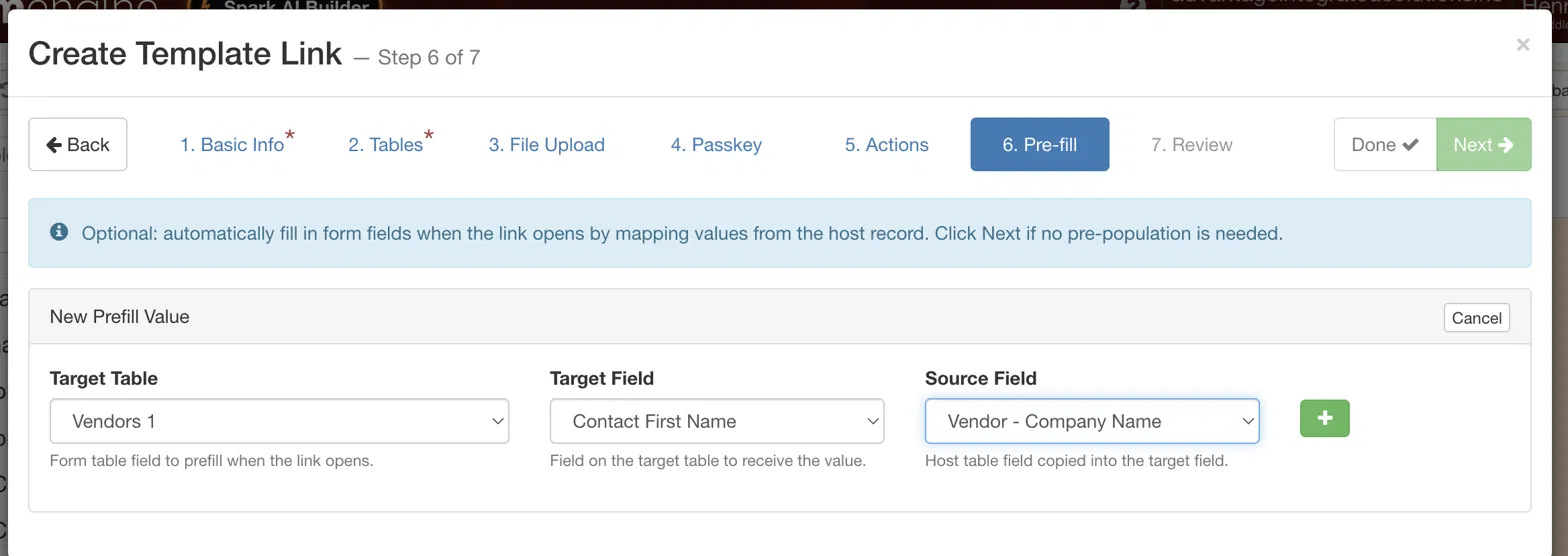
Step 6 — Pre-fill
Optional. Automatically fill form fields when the link opens by mapping values from the host record. Click Next if no pre-population is needed.
Add a mapping with New Prefill Value and the + button:
- Target Table — the form table field to prefill when the link opens.
- Target Field — the field on the target table that receives the value.
- Source Field — the host table field copied into the target field.
Saved mappings appear in the Prefill Values list, each with a remove control. You can add as many mappings as you need.
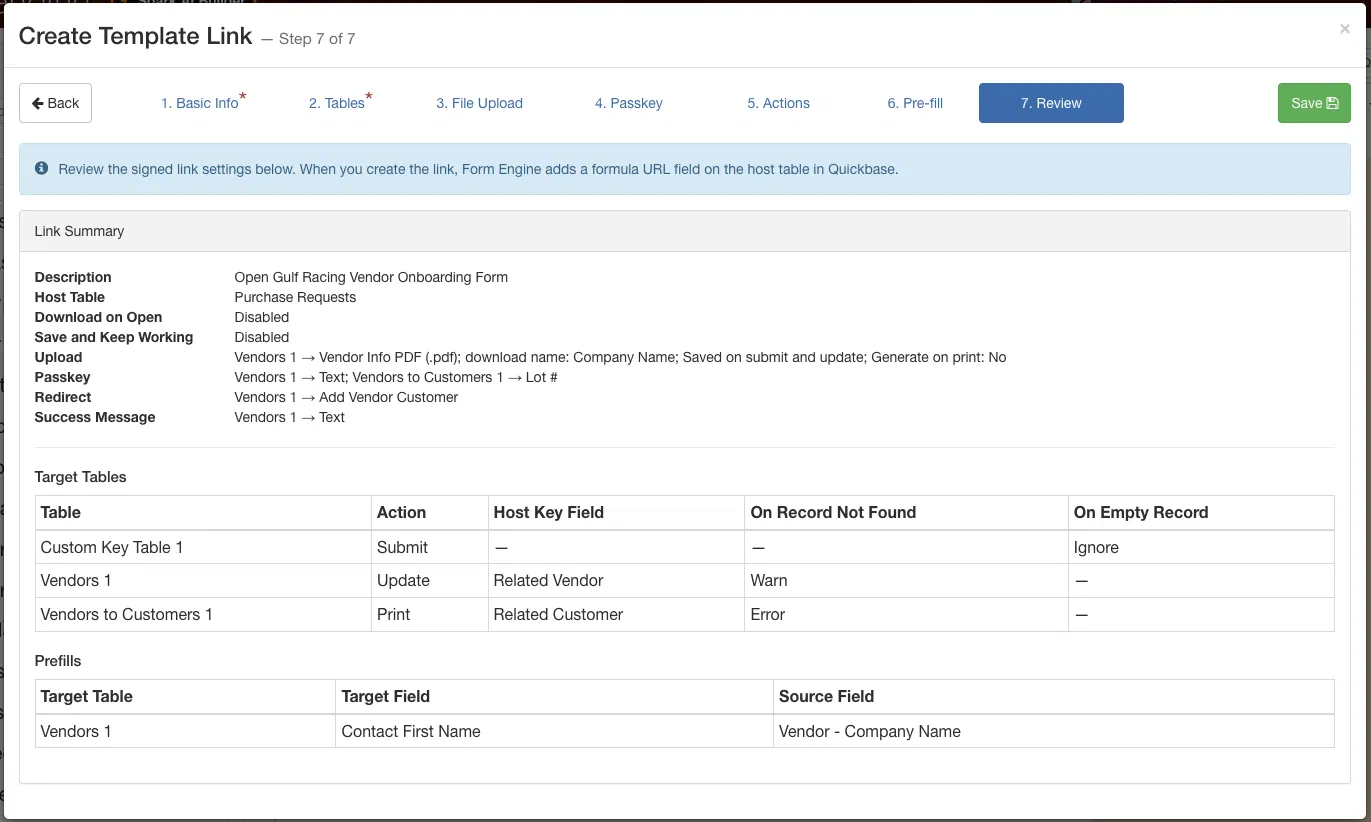
Step 7 — Review
Review all settings before saving. The Link Summary consolidates your choices; Target Tables and Prefills show the per-table and mapping detail.
Click Save to create the link. For an Embedded Table Link, Form Engine adds a formula URL field on the host table in Quickbase.